How to Remove Acrylic Nails at Home
Learning how to remove acrylic nails at home is an essential skill for anyone who loves salon enhancements but wants to protect their natural nails. When acrylic begins to grow out or lift, peeling or ripping the tips off is tempting. However, forcibly tearing acrylic strips away delicate keratin layers, causing painful thinning, peeling, and weeks of damage.
Taking off acrylic nails safely does not require an emergency salon visit. With pure acetone, simple manicure tools, and patience, you can dissolve acrylic extensions at home without trauma. This step-by-step tutorial covers the safest soak-off method, prep tips, and an essential aftercare routine to keep your natural nails strong and healthy.
Why You Should Remove Acrylic Nails Carefully
Acrylic nails bond to your natural plates using strong chemical polymers and adhesives designed to last for weeks. When you bite, peel, or pry an acrylic nail away, the adhesive does not simply release. Instead, it violently rips away the top layers of your natural keratin plate.
Rushing or using force causes microscopic damage that takes months to repair. Here is why a gentle approach is essential:
- Prevents Severe Thinning: Forcible peeling strips multiple keratin layers, leaving underlying nail beds paper-thin and fragile.
- Avoids Painful Nail Bed Separation: Pulling on lifted acrylic can tear the nail plate off the bed, causing painful onycholysis.
- Stops Surface Pitting: Gentle dissolving leaves the surface smooth and intact, preventing uneven ridges and white patches.
- Reduces Infection Risks: Tearing nails creates microscopic wounds where moisture and bacteria easily settle.
- Ensures Faster Recovery: Nails soaked off gently remain healthy and ready for your next manicure without lengthy healing periods.
What You’ll Need for Safe Acrylic Removal

Before beginning, gather your supplies on a clean, well-lit surface. Having everything within reach ensures you will not search for items while your fingertips are wrapped:
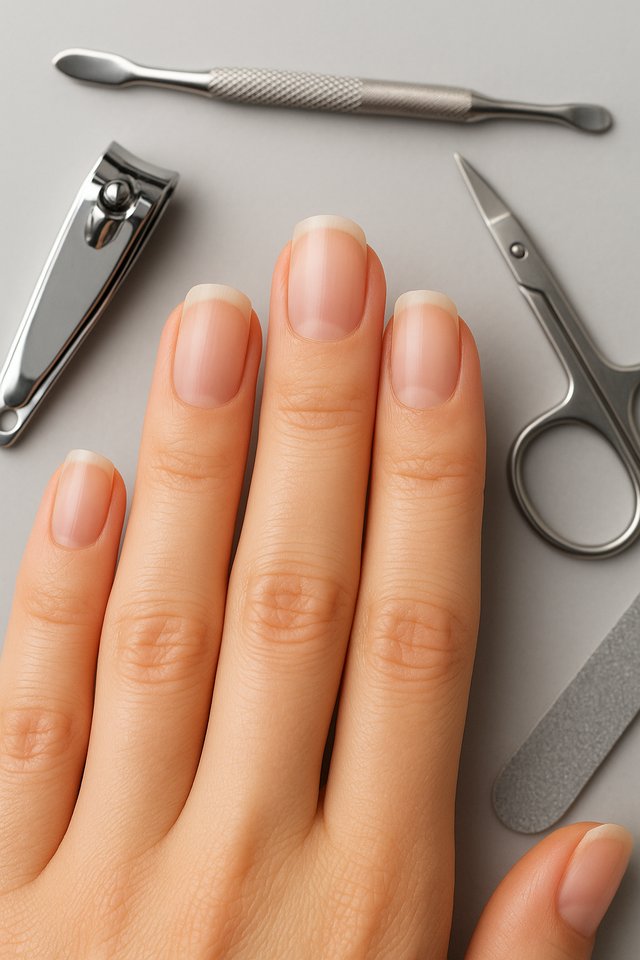
- Sturdy Nail Clippers: Shortens excess acrylic length before soaking.
- Coarse Nail File (100/180 Grit): Breaks through the shiny topcoat and debulks thick acrylic.
- Pure 100% Acetone: Regular polish remover will not dissolve acrylic; pure acetone is required.
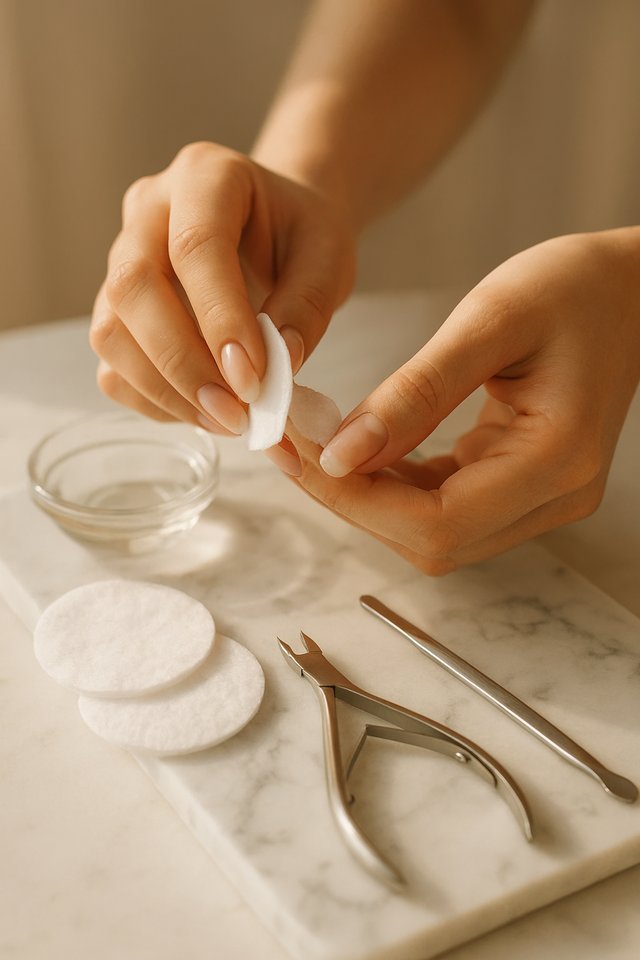
- Cotton Balls or Lint-Free Pads: Holds saturated acetone directly against each nail.
- Aluminum Foil Strips or Nail Clips: Cut into small squares to wrap and seal fingertips securely.
- Wooden Cuticle Stick: Gently nudges away softened, gummy acrylic without gouging natural beds.
- Fine Nail Buffer: Lightly smooths away remaining residue after product dissolves.
- Petroleum Jelly: Protects surrounding skin and cuticles from acetone dryness.
- Nourishing Cuticle Oil and Hand Cream: Restores deep moisture to parched nails post-removal.
Safety Precaution: Pure acetone is highly flammable and emits strong fumes. Always work in a well-ventilated space near an open window or fan, away from open flames and heat sources. Cover your workspace, as acetone dissolves plastics, paints, and wood finishes.
How to Remove Acrylic Nails at Home: Step-by-Step
Step 1: Trim the Acrylic Nails

Begin by clipping off excess acrylic length to reduce the amount of product acetone needs to dissolve. Using sturdy nail clippers, take small, controlled snips starting from one side of the tip across to the other, rather than cutting straight through the center in one chop.
Leave a couple of millimeters of acrylic beyond your natural fingertip to avoid clipping into real nail underneath. If the acrylic feels thick or resistant, trim in small increments to prevent cracks.
Step 2: File Down the Acrylic Surface
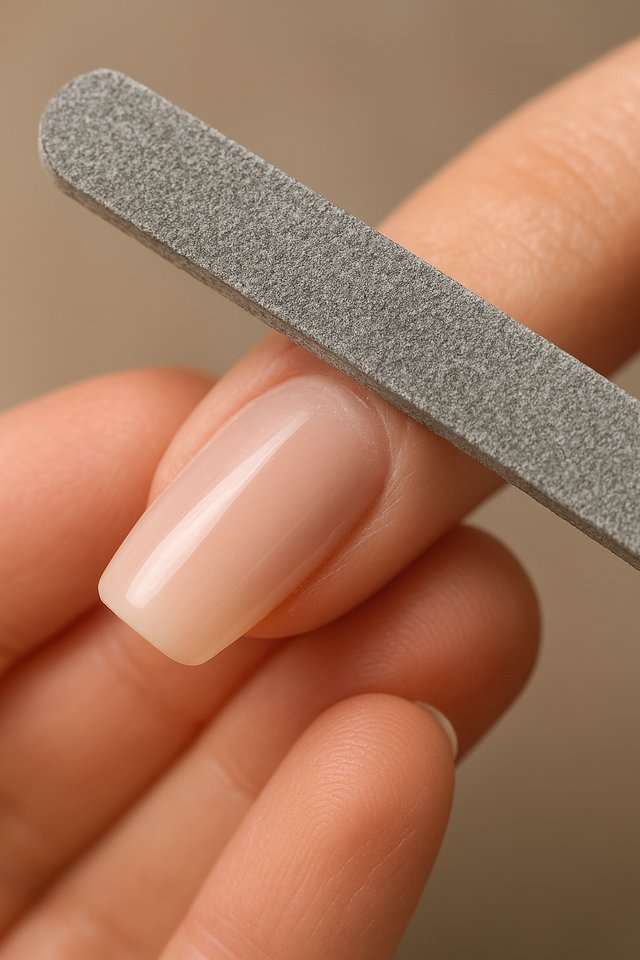
Gel topcoats and thick acrylic repel liquid acetone. Using the coarse 100-grit side of your nail file, vigorously file away the shiny topcoat and thin down the bulk of the acrylic overlay across each nail.
File in long, even strokes across the surface until the shine disappears and the acrylic looks powdery. Stop filing as soon as you near your natural nail bed or cuticle line to avoid damage.
Step 3: Protect the Surrounding Skin
Pure acetone strips moisture from skin quickly. Before wrapping, apply a generous layer of petroleum jelly or thick balm to the skin surrounding each nail bed, including cuticles and finger pads.
Avoid spreading petroleum jelly on the acrylic surface itself, as oils prevent acetone from penetrating. This barrier prevents redness, stinging, and keeps fingertips comfortable during soaking.
Step 4: Soak the Acrylic in Acetone

The cotton-and-foil wrap method dissolves acrylic efficiently while minimizing skin exposure to chemicals. Thoroughly saturate a cotton ball or pad with pure 100% acetone until soaked but not dripping.
Place the saturated cotton directly over the filed acrylic. Tightly fold an aluminum foil square over the cotton, crimping edges around your fingertip to lock in body heat. Repeat on all ten fingers.
Step 5: Wait Patiently
Patience is essential for damage-free removal. Once fingers are wrapped, sit back and allow the acetone to break down the hardened acrylic polymers for 20 to 30 minutes without disturbance.
To speed up dissolving safely, place a warm towel or heating pad over your foil-wrapped hands. Warmth activates acetone and accelerates breakdown. Avoid unwrapping early, as peeking lets acetone evaporate.
Step 6: Gently Remove Softened Acrylic
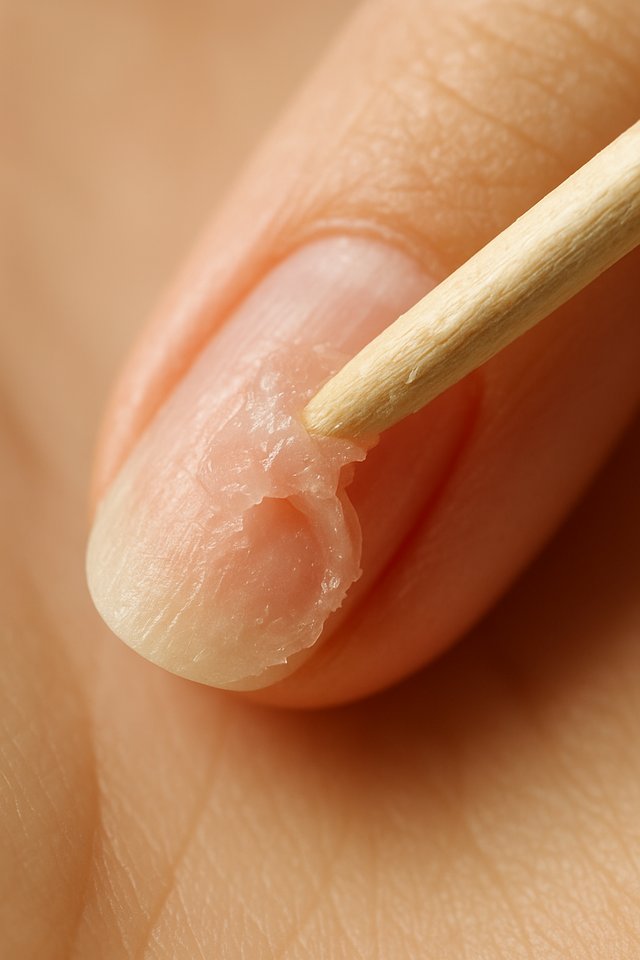
After 25 minutes, twist and pull the foil wrap off one test finger. The acrylic should appear softened and gummy. Using the slanted edge of an orange wood stick, gently push the melted acrylic from cuticle to tip.
Softened product should slide away easily with minimal pressure. If the acrylic remains hard or firmly attached, stop immediately. Re-wrap the finger with fresh acetone for another 10 to 15 minutes. Never force or scrape hard against stubborn acrylic.
Step 7: Remove Remaining Residue
Once the bulk of the acrylic is off, you may notice tiny patches of base glue or thin residue on the nail plate. Dip a cotton swab in acetone to gently rub away soft traces.
For any slight roughness left behind, use a fine-grit buffer (240-grit or higher) to lightly buff the surface in one direction. Do not sand aggressively; smooth only until clean and even.
Step 8: Wash and Moisturize Your Hands
Immediately wash your hands thoroughly with lukewarm water and mild moisturizing soap to remove all chemical acetone residue from your skin and nails. Avoid harsh antibacterial soaps.
Pat hands dry and apply rich cuticle oil over nail plates and cuticles, massaging gently. Follow with a thick, nourishing hand cream containing shea butter or ceramides to restore lost moisture.
How to Remove Acrylic Nails Without Acetone
Many wonder whether acrylics can be removed without pure acetone. While non-acetone polish removers, warm oil baths, and dish soap mixtures exist, their ability to dissolve hardened acrylic polymers is extremely limited.
Soaking nails in warm water, dish soap, and olive oil can soften light nail glue or press-on tips over 40 minutes. However, salon acrylics bonded with primer do not dissolve in water. Attempting to pry acrylic off with dental floss or tweezers after oil soaks causes severe tearing. If you lack acetone, visit a professional salon.
Can You Remove Acrylic Nails With Hot Water?
A popular internet myth suggests that soaking fingers in hot water removes acrylic nails. In reality, warm water cannot break down cross-linked acrylic polymers. Acrylic is waterproof, which is why it survives showers, dishwashing, and swimming.
While warm water softens surrounding cuticle skin and loosens lifting edges, the acrylic stays firmly attached. Trying to pry off nails after hot water soaking tears natural keratin layers. Never rely on hot water as an acrylic removal agent.
How Long Does It Take to Remove Acrylic Nails at Home?
On average, complete, damage-free acrylic removal at home takes between 45 and 60 minutes. Trimming, filing, and foil preparation takes 15 minutes, followed by 20 to 30 minutes of soaking, and 10 minutes for gentle buffing and aftercare.
Thicker acrylic overlays, dipping powder, or encapsulated glitter may require a second 15-minute soak. Setting aside dedicated quiet time is vital. Rushing through the process is the primary reason people resort to harmful prying.
Tips for Protecting Your Natural Nails
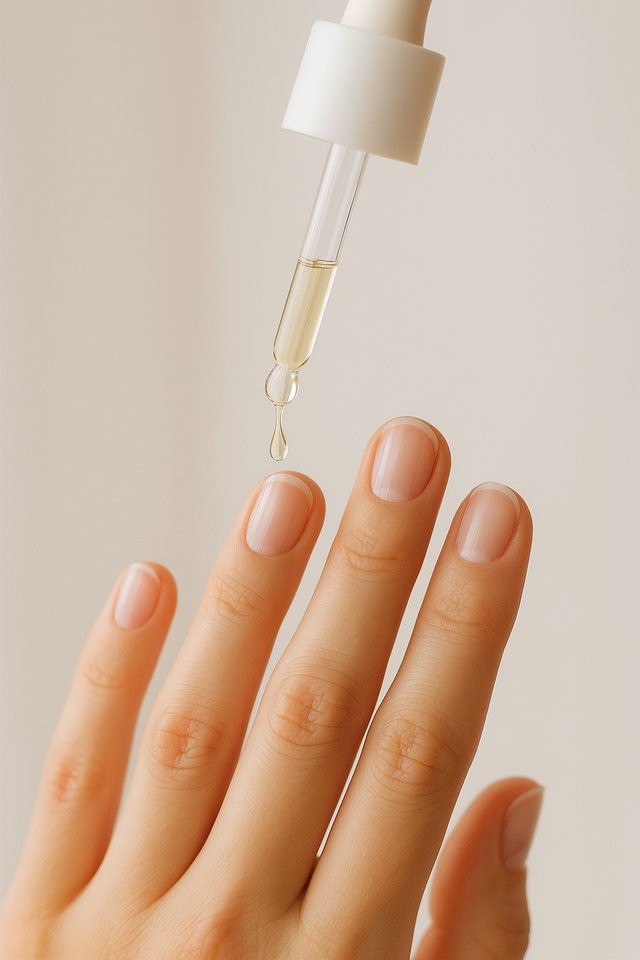
Safeguarding your natural nail health requires mindful habits throughout removal. Keep these golden rules in mind whenever taking off acrylic enhancements:
- Never Rip or Peel: Peeling off an acrylic nail rips up to 50% of your natural nail plate thickness in a single pull.
- Never Pry with Tools: Keep metal tweezers, cuticle nippers, and sharp files away from the undersides of your nails.
- Re-Soak Stubborn Spots: When acrylic resists, ten more minutes of foil soaking is always safer than hard scraping.
- Buff with a Gentle Hand: Never use coarse files on bare natural nail beds; stick to soft, fine buffers.
- Hydrate Daily: Apply cuticle oil at least twice daily to replenish natural lipids stripped by acetone exposure.
- Give Nails a Rest Period: Allow natural nails one to two weeks of recovery between back-to-back acrylic sets.
Aftercare: What to Do After Removing Acrylic Nails

Your natural nails will feel slightly sensitive immediately after removal because they have been sealed away from moisture for weeks. Establishing a restorative aftercare routine helps natural keratin harden and regain resilience.
Keep natural nails trimmed short and filed into a smooth, rounded shape for the first two weeks. Shorter lengths prevent bending, snagging, and peeling while new keratin strengthens. Massage jojoba cuticle oil into cuticles every morning and night, sealing with rich hand cream.
Apply a strengthening keratin or calcium coat once weekly to protect bare surfaces during daily chores. Always wear rubber gloves when washing dishes or handling cleaning chemicals. If you observe persistent throbbing, swelling, severe redness, or discoloration, consult a licensed dermatologist or nail professional.
Common Mistakes to Avoid When Taking Off Acrylics
Avoiding these frequent removal pitfalls will save your natural nails from preventable damage:
- Using Regular Polish Remover: Non-acetone remover evaporates without dissolving acrylic, wasting time and drying skin.
- Prying Lifted Acrylic: Pulling lifted edges tears natural nail fibers, causing severe thinning and tenderness.
- Filing Too Deeply: Using heavy grit files on natural nail beds removes healthy keratin and causes burning sensations.
- Skipping Petroleum Jelly: Leaving skin unprotected leads to white, dehydrated, and irritated fingertips from acetone.
- Impatience During Soaking: Attempting to scrape product before it turns completely gummy causes deep surface scratches.
- Neglecting Post-Removal Care: Failing to moisturize leaves natural nails brittle and prone to splitting.
Frequently Asked Questions (FAQ)
Can I remove acrylic nails at home?
Yes, you can safely remove acrylic nails at home using pure 100% acetone, cotton pads, aluminum foil, and a gentle wooden cuticle pusher. Patience and gentle technique are essential to protect your natural nail plates.
What is the easiest way to remove acrylic nails?
The cotton-and-foil wrap method is the easiest and cleanest technique. It concentrates acetone directly on the acrylic while locking in body heat, minimizing skin exposure compared to open bowl soaking.
How long should I soak acrylic nails in acetone?
Acrylic nails typically require 20 to 30 minutes of undisturbed soaking in pure acetone. Thicker sets or gel-encapsulated designs may need an additional 10 to 15 minutes of wrapping.
Can I remove acrylic nails without acetone?
Non-acetone methods cannot chemically dissolve acrylic polymer bonds. While oil and warm water can loosen light press-ons, trying to remove salon acrylic without acetone leads to painful tearing and nail damage.
Can hot water remove acrylic nails?
No, hot water cannot dissolve acrylic because acrylic polymers are waterproof. Using hot water to pry off stubborn nails will peel away natural keratin layers and damage nail beds.
Will removing acrylic damage my natural nails?
Removing acrylic does not damage natural nails when done correctly through gentle acetone soaking. Damage occurs when acrylic is ripped, peeled, or aggressively scraped off.
What should I put on my nails after removing acrylic?
Generously apply jojoba cuticle oil to rehydrate nail plates, followed by a thick ceramide hand cream. A nourishing nail strengthener can also be applied to protect bare nails.
How do I remove acrylic nails without damaging my natural nails?
Shorten excess acrylic with clippers, file away the glossy topcoat, soak patiently in pure acetone with foil wraps, gently slide off melted product, and never force or pry stubborn spots.
Conclusion: Safe and Gentle Acrylic Removal
Mastering how to remove acrylic nails at home allows you to enjoy stunning salon enhancements without sacrificing the long-term health of your natural nails. By resisting the temptation to peel or pry, gathering the right supplies, and allowing pure acetone to dissolve the product gently, your natural nails will remain intact, strong, and ready for your next manicure.
Remember that patience is the ultimate tool in safe nail care. Nourish your fingertips with generous coats of cuticle oil and rich moisturizer, give your nails time to breathe, and enjoy the satisfaction of healthy natural nails!
https://review.stylevore.com/craw-ford-construction/
https://www.b2bco.com/crawfordconstruction/
https://www.freelistingusa.com/listings/trusted-builders-in-oxford-for-extensions-near-me
https://www.provenexpert.com/craw-ford-construction/?mode=preview
http://www.4mark.net/story/16257474/builders-in-oxford-extensions-loft-conversions-new-builds-%e2%80%93-crawford-construction
https://go.famuse.co/crawfordconstruction
https://www.futurelearn.com/profiles/23200710
https://github.com/crawfordconstruction
https://www.pressregister.com/user/public-profile/96312
https://reviews.birdeye.com/claim-submission-received/
https://www.reverbnation.com/artist/crawfordconstruction
https://solo.to/crawfordconstruction
https://www.brownbook.net/business/55180897/trusted-builders-in-oxford-for-extensions-near-me
https://wakelet.com/wake/1aqFFumXZhmdYfVTLlm9Y
https://www.trepup.com/@crawfordconstruction
https://forum.eset.com/profile/119997-crawford-construction/
https://www.n49.com/biz/7235799/crawford-construction-walton-oxford-115-walton-street-oxford-united-kingdom/
https://dot.cards/crawfordconstruction
https://orpetron.com/user/crawfordconstruction
https://reviews.birdeye.com/claim-submission-received/
https://freewebmarks.com/story/trusted-builders-in-oxford-for-extensions-near-me
https://6a2922eedc4bf.site123.me/
https://mentalzon.com/en/therapist/19584/crawford-construction
https://sprd.li/wszt6aa0tomdi?utm_medium=website&utm_source=spreadly.app&utm_campaign=link&utm_term=Open
https://app.tpn.health/profile/crawfordconstruction136007
https://thingtesting.com/crawfordconstruction/reviews
https://classipages.com/profile/craw-ford-construction/
https://www.intensedebate.com/people/crawfordbulider
https://www.pbookmarking.com/story/builders-in-oxford-extensions-loft-conversions-amp-new-builds-crawford-construction
https://directory9.net/listing/trusted-builders-in-oxford-for-extensions-near-me.html
https://www.smallbizamerica.org/oxford/business-services/crawford-construction
https://www.selfemployedai.com/oxford/business-services/trusted-builders-in-oxford-for-extensions-near-me
https://www.biz411.org/oxford/business-services/trusted-builders-in-oxford-for-extensions-near-me
https://www.nextbizmaker.com/oxford/business-services/trusted-builders-in-oxford-for-extensions-near-me
https://www.bigbizmaker.com/business-services/crawford-construction
https://www.dewalist.com/services/other-business-services/trusted-builders-in-oxford-for-extensions-near-me-oxford-685566.html
https://adfty.biz/user/crawfordconstr/
https://jamessmithjg82.systeme.io/crawford-construction
https://www.charitywater.org/crawford-construction
https://vimeo.com/user260231773
https://soundcloud.com/crawford-construction
https://www.slideshare.net/jamessmithjg82?tab=about
https://3dwarehouse.sketchup.com/by/crawfordconstruction
https://hashnode.com/@crawfordconstruction
https://speakerdeck.com/crawfordconstruction
https://heylink.me/jamessmithjg82/
https://crawfordconstruction.taplink.site/
https://sites.google.com/view/crawfordconstructiond/home
https://www.producthunt.com/@new_user___1752026aac145657eb5c004
https://viesearch.com/crawfordconstruction
https://crawfordconstruction.onesmablog.com/trusted-builders-in-oxford-for-extensions-renovations-new-builds-83400029
https://bookmark4you.online/page/business-services/professional-construction-design-under-one-roof
https://www.iformative.com/product/trusted-builders-in-oxford-for-extensions-near-me-p3069167.html
https://www.bizforgeusa.com/oxford/business-services/crawford-construction
https://startupbase.io/@crawfordconstruction
https://seniorsdiscountclub.com.au/members/crawfordconstruction.228174/
https://gpslistings.com/listing/crawford-construction/
https://crawfordconstruction.fitnell.com/83047503/trusted-builders-in-oxford-for-extensions-renovations-new-builds
https://exchange.construction/contractors/general-contractor/crawford-construction/
https://culturesbook.com/1782304472680703_92045
https://newworldtube.com/u/CrawfordConstruction
https://writeablog.net/pxgqb9k1ns
https://crawfordconstruction.worldblogged.com/48365480/trusted-builders-in-oxford-for-extensions-renovations-new-builds
https://crawfordconstruction.blogrenanda.com/48922976/trusted-builders-in-oxford-for-extensions-renovations-new-builds
https://www.ted.com/profiles/51787686
https://devpost.com/crawfordconstruction
https://www.blurb.com/user/crawfordcons?profile_preview=true
https://triberr.com/crawfordconstruction
https://medium.com/p/58045a9f18b4?postPublishedType=initial
https://unsplash.com/@crawfordconstruction
https://issuu.com/crawfordconstruction?ps=24
https://www.zipleaf.co.uk/Companies/Crawford-Construction
https://www.starbookmarking.com/story/builders-in-oxford-crawford-construction
https://ybookmarking.com/story/builders-in-oxford-crawford-construction
https://www.quora.com/profile/Crawford-Construction-1/Professional-Construction-Design-under-one-roof-Crawford-Construction-is-an-established-FMB-listed-building-company
https://dev.to/crawfordconstruction/professional-construction-design-under-one-roof-2a44
https://hub.docker.com/u/crawfordconstruction?_gl=1*1kbnwmr*_gcl_au*MTc1MjA5NzY3OC4xNzgyNTUzMDgzLjk0Mzk2NDg2Ny4xNzgyNTUzMDg5LjE3ODI1NTMxMzE.*_ga*ODIwOTkyMzgwLjE3ODI1NTMwODI.*_ga_XJWPQMJYHQ*czE3ODI1NTMwODIkbzEkZzEkdDE3ODI1NTMxMzEkajExJGwwJGgw
https://gravatar.com/powerful0160529434
https://kahkaham.net/crawfordconstruction
https://myanimelist.net/profile/crawford0
https://www.apsense.com/user/crawfordconstruction
https://coub.com/e81d4a06f9aebe4863d0
https://giphy.com/channel/crawfordconstruction
https://headwayapp.co/crawfordconstruction-co-changelog
https://funadvice.com/l/trusted-builders-in-oxford-for-extensions-near-me
https://startupxplore.com/en/person/crawford-construction
https://www.gravitysplash.com/?post_type=listing&p=208367
https://www.babelcube.com/user/crawford-construction
https://expathealthseoul.com/profile/crawford-construction/
https://www.komoot.com/user/5946805503468
https://www.acompio.co.uk/Crawford-Construction-47758780.html
https://writeablog.net/c0xold3ajj
https://zenwriting.net/unccq8muj2
https://crawfordconstruction.getblogs.net/74785191/trusted-builders-in-oxford-for-extensions-renovations-new-builds
https://crawfordconstruction.timeblog.net/78052044/professional-construction-design-under-one-roof
https://crawfordconstruction.blogofoto.com/73641594/trusted-builders-in-oxford-for-extensions-renovations-new-builds
https://crawfordconstruction.acidblog.net/73437166/our-building-services-in-oxford
https://www.findinall.com/ad/22449
https://www.1001fonts.com/users/james-smith3/
https://yuneecpilots.com/members/crawfordconstruction.54541/
https://homebuilderguides.weebly.com/blog/tips-for-choosing-a-home-builder#comments
https://eclecticbuilders.weebly.com/blog/guildquality-rewards-success-in-the-building-and-remodeling-trades#comments
https://legitpersonalizedhomebuilders.weebly.com/blog/build-custom-homes-how-to-choose-the-right-home-builder#comments
https://buildingserviceuk.weebly.com/blog/why-new-builds-are-popular-with-first-time-buyers-the-smart-start-to-homeownership#comments
https://homebuilders4.weebly.com/blog/choose-a-home-builder2013606#comments
https://cherryhomes.blogspot.com/2025/11/design-and-build-adelaide.html?sc=1784199788606#c7764177011039479734
https://homnhomes.blogspot.com/2025/08/house-construction-in-trivandrum-homn.html?sc=1784199831526#c7258474641790314566
https://inporiem.blogspot.com/2024/08/uk-house-builders-10-highest-rated-for.html?sc=1784199866787#c3226262412295997941
https://dornabuilders.blogspot.com/2020/01/structural-engineers-play-bigger-role.html?sc=1784199950817#c764074160911990753
https://lewisbuildnz.blogspot.com/2024/08/how-to-choose-right-home-builder.html?sc=1784199987901#c5063707021222234566
https://www.ihtiyacinolanial.com/blog/best-leather-bags
https://www.free-socialbookmarking.com/story/builders-in-oxford-crawford-construction
https://www.bookmarkingfree.com/story/builders-in-oxford-crawford-construction
https://www.4shared.com/u/cvWsuQ4n/jamessmithjg82.html
https://log.concept2.com/profile/3006030
https://www.atlasobscura.com/users/ac400790-bed2-4f4a-84fd-f685be38d466
https://huggingface.co/crawfordconstruction
https://pubhtml5.com/homepage/ecsza/
https://crawfordconstruction.aioblogs.com/94977003/trusted-builders-in-oxford-for-extensions-renovations-new-builds
https://crawfordconstruction.widblog.com/97164809/building-services-in-oxford
https://findaspring.org/members/jamessmith3/
https://codexinh.com/user/crawfordconstruction
https://www.themirch.com/listing/trusted-builders-in-oxford-for-extensions-renovations-new-builds/
https://www.grepmed.com/crawfordconstruction
https://hosted.weblate.org/user/crawfordconstruction/
https://www.gooalsocial.com/-crawfordconstruction
https://zekond.com/post/807293_crawford-construction-is-a-established-fmb-listed-building-company-based-in-oxfo.html
https://www.leenkup.com/crawfordconstruction
https://network.musicdiffusion.com/crawfordconstruction
https://www.ganjingworld.com/channel/1indcelrmee2pgrfFAac1bNdb1vt0c?tab=posts&subtabshowing=latest&subTab=all
https://annettefrommer.blogspot.com/2021/12/tips-to-guide-you-from-to-z-part-3.html?sc=1785320072979#c3457494152712439954
https://niagaranovice.blogspot.com/2014/07/the-business-of-interior-design.html?sc=1785320140035#c6047619281920955958
https://rhballard.blogspot.com/2010/06/my-top-10-picks-for-best-design.html?sc=1785320215358#c992732215203173707
https://nicolasdepompadour.blogspot.com/2016/08/the-homes-and-interiors-of-downton-abbey.html?sc=1785320252567#c2712767785692337470
https://southgateresidential.blogspot.com/2017/02/a-whole-house-renovation.html?sc=1785320341822#c8438844889722969720
https://gitlab.com/crawfordconstruction
https://www.cargodirectory.co/oxford/office-maintenance-services/crawford-construction
https://logcla.com/blogs/1758313/Professional-Construction-Design-under-one-roof
https://www.skool.com/@crawford-construction-5776
https://www.spreaker.com/user/crawford-construction–19240116
https://app.notion.com/p/Crawford-Construction-is-an-established-FMB-listed-building-company-based-in-Oxford-We-design-and–3b15d8443e0e80559d5cedf538c72c96
https://codeberg.org/crawfordconstruction
https://linktr.ee/crawfordconstruction
https://campsite.bio/crawfordconstruction
https://bio.site/crawfordconstruction
https://pinshape.com/users/9028859-jamessmithjg82?tab=designs
https://topsitenet.com/user/crawfordconstruction/
https://www.anibookmark.com/user/crawfordconstruction.html
https://www.letsdobookmark.com/story/top-builders-in-oxford-fixed-price-amp-10-yr-guarantee-crawford-construction-ltd
https://www.bizmaker.org/oxford/business-services/crawford-construction
https://www.dibiz.com/jamessmithjg82
https://addyp.com/listing/england/oxford-circus-151/homestays/crawford-construction
https://www.newsocialbookmarkingsite.com/story/top-builders-in-oxford-fixed-price-amp-10-yr-guarantee-crawford-construction-ltd
https://crawfordconstruction.blogoscience.com/49290266/trusted-builders-in-oxford-for-extensions-renovations-new-builds
https://freead1.net/ad/6800716/professional-construction-design-under-one-roof.html
https://crawfordconstruction.onzeblog.com/42622773/house-extension-builders-in-oxford
https://crawfordconstruction.eedblog.com/42711057/trusted-house-extension-specialists-across-oxford-and-oxfordshire
http://www.megathings.com/crawford-construction/
https://crawfordconstruction.blogpayz.com/42720725/trusted-house-extension-specialists-across-oxford-and-oxfordshire
https://crawfordconstruction.xzblogs.com/82947415/house-extension-builders-in-oxford
https://rentry.co/fyqhdy9n
https://www.homepros411.com/oxford/business-services/crawford-construction
https://www.biztobiz.org/oxford/business-services/crawford-construction
https://www.blogbangboom.com/oxford/business-services/crawford-construction
https://www.bizlinkbuilder.com/oxford/business-services/crawford-construction
https://www.bizbangboom.com/oxford/business-services/crawford-construction
https://www.americasmallbiz.com/oxford/business-services/crawford-construction-ltd
https://www.bigbizstuff.com/oxford/business-services/crawford-construction
https://www.bizbuildboom.com/oxford/business-services/crawford-construction
https://crawfordconstruction.hub.biz/
https://www.yplocal.com/united-kingdom/oxford/business-professional-services/crawford-construction
https://crawfordconstruction.blogocial.com/smart-home-automation-specialists-in-oxford-78796803
https://crawfordconstruction.ampedpages.com/smart-home-technology-built-in-from-the-start-69722904
https://crawfordconstruction.ampblogs.com/smart-home-technology-built-in-from-the-start-79652269
https://stackblitz.com/@crawfordconstruction
https://codesandbox.io/u/crawfordconstruction
https://www.ubookmarking.com/story/bespoke-loft-conversions-in-oxford-fixed-price-crawford-construction-ltd-2
https://www.abookmarking.com/story/bespoke-loft-conversions-in-oxford-fixed-price-crawford-construction-ltd
https://www.localelinkup.com/crawford-construction
https://forum.squarespace.com/profile/561995-crawfordconstruction/
https://www.websitescrawl.com/website-info/98fd885baabc52b1ceccc8a930439f38/
https://bsky.app/profile/did:plc:uvvwh7cl62qbszkhvw76mgbi/post/3mtljxalqtk2i
https://www.affilorama.com/member/crawfordconstruction
https://biolinky.co/crawfordconstruction
https://www.iglinks.io/jamessmithjg82-o8g?preview=true
https://recentstatus.com/crawfordconstruction
https://articlescad.com/professional-construction-design-under-one-roof-300734.html
https://pixabay.com/users/crawfordconstruction-57238163/
https://www.kickstarter.com/profile/crawfordconstruction
https://www.skillshare.com/en/user/crawfordconstruction
https://www.globalbusinesslisting.org/trusted-builders-in-oxford-for-extensions-near-me
https://salesale.sale/user/crawfordconstruction/
https://crawfordconstruction.blogkoo.com/trusted-builders-in-oxford-for-extensions-renovations-new-builds-62585316
https://leetcode.com/u/crawfordconstruction/
https://www.myminifactory.com/users/crawfordconstruction
https://writeupcafe.com/author/crawfordconstruction
https://phijkchu.com/a/crawfordconstruction/video-channels
https://postheaven.net/zasd2nzc11
https://www.ganjingworld.com/channel/1indcelrmee2pgrfFAac1bNdb1vt0c
https://foss.heptapod.net/crawfordconstruction
https://fueler.io/crawfordconstruction
https://www.mindmeister.com/app/map/4076947417?t=gYbwFXSEFd
https://peatix.com/user/30430579/view
https://crawfordconstruction.blogolize.com/trusted-builders-in-oxford-for-extensions-renovations-new-builds-82097652
https://www.insanelymac.com/forum/profile/2758860-crawfordconstructionltd/?tab=field_core_pfield_13
https://www.dosula.com/user/crawfordconstruction
https://zumvu.com/crawfordconstruction/
https://app.talkshoe.com/user/crawfordconstruction
https://www.cake.me/me/crawfordconstruction
https://opencollective.com/crawford-construction-ltd
https://amazingradio.us/profile/crawfordconstruction
https://janjaonline.mn.co/members/41524263
https://network-316491.mn.co/members/41524350
https://nova-driving-school.mn.co/members/41524375
https://yeet.md/s/MQxsuxgM
https://rentry.co/crawford-construction-oxford
https://www.bizify.co.uk/builders/oxford/OX2-6AJ/crawford-construction-ltd
https://oxford-house-extensions.surge.sh/
https://crawford-builders-oxford.surge.sh/
https://altcourt.org/profile/82665
https://www.braidbabes.com/profile/jamessmithjg8299380/profile
https://www.meinkatzcreations.com/profile/jamessmithjg8239138/profile
https://www.twilightcreationsinc.com/profile/jamessmithjg8214798/profile
http://www.flokii.com/users/view/203864
https://developer.cisco.com/user/profile/5e3147bd-83b2-5afb-8103-971b1a303224
https://www.outdooractive.com/en/member/james-smith/352893091/
https://www.proko.com/@james_smith_2/activity
https://topconstructingcompany.blogspot.com/2020/06/the-pre-construction-stage-is-begun.html?sc=1789806765163#c8626416185050428936
https://industrialbuildingcontractorschennai.blogspot.com/2023/08/industrial-building-contractorsindustri.html?sc=1789806995410#c7354042874057294994
https://warehousebuildingcontractor.blogspot.com/2023/08/warehouse-building-contractorswarehouse.html#comments
https://advanceengineeringsp.blogspot.com/2015/06/the-basic-architecture-of-construction.html?sc=1789807353314#c8514015890192272506
https://www.best4discounts.com/author/crawfordconstruction/
https://www.social-vape.com/crawfordconstruction
https://wemakeit.com/users/crawfordconstruction
https://verdoos.com/profile/crawfordconstruction
http://mootin.com/story/business/trusted-builders-in-oxford-for-extensions
https://netu.ai/users/crawfordconstruction
https://maxforlive.com/profile/user/crawfordconstruction?tab=about
https://linkbio.co/crawfordconstruction
https://www.jamiihuru.com/crawfordconstructionltd
https://devpost.com/crawfordconstruction?ref_content=user-portfolio&ref_feature=portfolio&ref_medium=global-nav
https://leetcode.com/u/crawfordconstruction/
https://support.mozilla.org/en-US/user/crawfordconstruction/
https://www.flyingpepper.in/profile/crawfordconstruction/profilehttps://slideslive.com/ijapixpvlllp/?tab=abouthttps://www.designspiration.com/jamessmithjg82/saves/https://www.adpost.com/u/crawfordconstruction/https://onescreener.com/crawford-construction-ltd?https://www.jobcase.com/profile/0LK2RcehncxfDFfBrPNVubW_https://rapchat.com/profile/9C41F5F0-BF0B-11F1-8FB3-3F14531646AAhttps://www.ukiyoto.com/profile/jamessmithjg8221330/profilehttp://shambaza.com/profile/crawford-construction/https://www.facer.io/u/crawfordconstructionhttps://experiment.com/users/crawfordconstructionhttps://profile.hatena.ne.jp/crawfordconstruction/https://www.youthkiawaaz.com/author/crawfordconstructionhttps://www.eminamclean.com/profile/jamessmithjg8286518/profilehttps://www.hozpitality.com/profile/crawfordconstructionltd